Once upon a time, my handmade Christmas gifts were knitted items. I welcomed every October (far too late to start, as any seasoned knitter probably knows) with an ambitious list of gifts matched to recipients. I always failed to complete most of the list, but it didn’t stop me from repeating my habit the next fall.
Until last year. Having a Christmas baby changed the way I think about holiday gift-making and gift-giving. I knew well in advance that only a crazy person would try to knit gifts for everyone while preparing, and subsequently caring, for a new baby. Unless you count the many sweaters I knit for Adelaide prior to her arrival as Christmas presents, not a single person received a hand knit from me that year.
This holiday season, knitted gifts will be nearly as absent from my “to-make” list as they were last year. I do have a couple of exceptions – a stuffed brontosaurus for Addie’s birthday and a well-fitting winter hat and pair of mittens for her Christmas stocking. Since I’m knitting the latter two in miniature adult, they won’t take me much longer than a weekend (next weekend my ambitions self says), and the boogie woogie brontosaurus? With three weeks to go until the big birthday [party, he’s only lacking in the leg department. By December 8th he will have ample legs upon which to boogie. I promise.
Those who might have made it onto my knit list in prior years? They are still getting handmade gifts. Just not of the fiber variety. I’m not going to divulge too much, as prying eyes may be reading, but as a concession, I’ve put together a roundup of my eight favorite DIY gift ideas. My near-term weekend plans may or may not involve making a few items on the list. Tutorials are linked to the photos.

I adore chalkboard paint, especially when applied to surfaces that are not playroom walls. So I maybe swooned a little when I discovered this how-to. Added bonus: check out the link to a tutorial that shows you how to turn any paint into chalkboard paint

A good book ranks high on my list of ideal gifts for giving. Pair it with one of these adorable pompom bookmarks, and it’s even better.

This is one of the cutest felt boards I’ve seen. Sure, it requires a pretty significant time commitment, but the finished result is fabulous.

I know the “in a jar” trend is nothing new, but I’m still as in love with the idea as I was when I first discovered it. These jarred pumpkin pies look delicious and gorgeous – a perfect food gift for the holidays.

Keeping with the “in a jar” theme, I love the minimalist look of this Christmas in a Jar potpourri mix

And one more gift in a jar – homemade finger paint. This recipe uses common household ingredients that won’t harm little ones should they happen to ingest a bit of color.

If I had a decent sewing machine and few afternoons worth of time, I’d sew a stuffed fox for all the little ones in my life. The cuteness. It slays.

I don’t often consider making wall art to gift, but this tutorial, which shows you how to transfer images onto wood has me reconsidering.


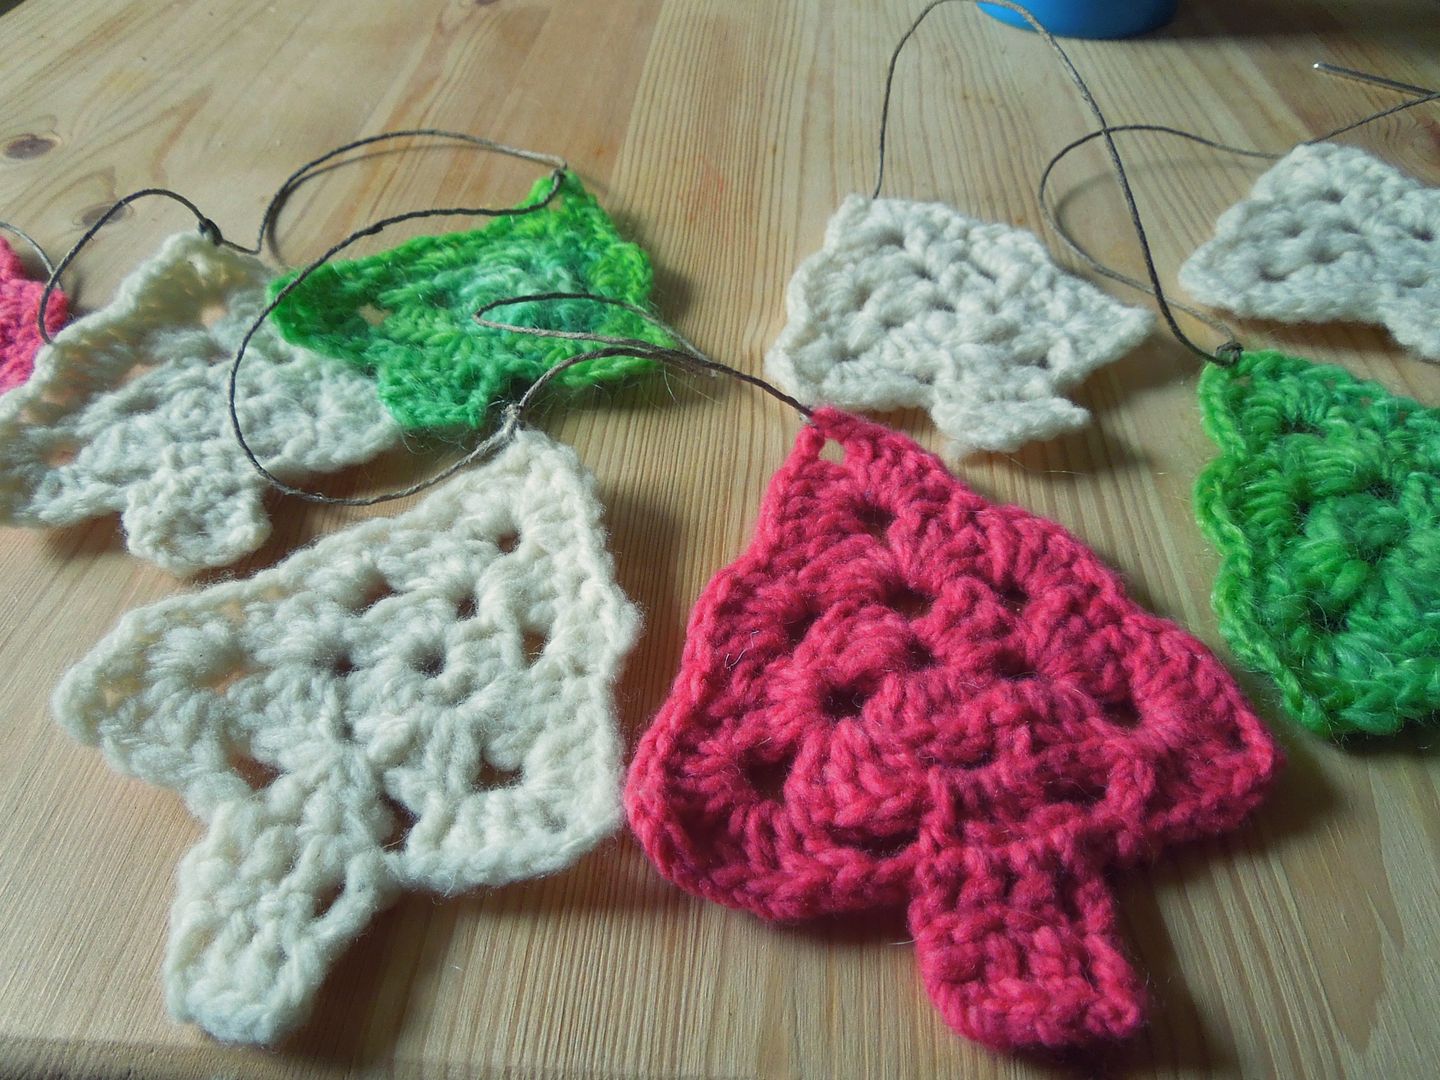
 If you want to make stained glass ornaments my way, check out the tutorial!
 I know these little guys are not exactly ornaments, but they’re small enough to nestle in the branches of a larger Christmas tree without weighing it down.


 Unlike Christmas movies, which I have no reservations about popping in the DVD player whenever the spirit moves me, Christmas decorations have no place in our home until mid-November at the very earliest. Besides, I am not yet prepared to part with my collection of ornamental gourds, my turkey pumpkin, and the autumn wreath I made a few weeks ago.
 I may be waiting a little longer before I litter my house with fake evergreen and garlands ranging from the rustic, handmade variety to the tacky, sparkly, but with the crocheted trees began my holiday crafting spree. From now until December 24th I’ll be churning out ornaments, assembling gift baskets, knitting my fingers numb, and baking quick breads and candies until I am covered, head-to-toe, in a semi-permanent dusting of confectioner’s sugar. Although I will work up until Christmas, November is the best month for holiday make-ready, and I am celebrating with four weeks of Tutorial Tuesdays.
Starting next week, I’ll post a holiday DIY tutorial on the blog every Tuesday through the end of the month. This year’s theme is cheap and chic ornaments. Every project features supplies you probably already have lying around the house, or that you can buy for less than five dollars at any craft store. They may not cost much money or take much time to make, but I think the DIY project I have planned this month will add a ton of handmade cuteness to your holiday.
I may be waiting a little longer before I litter my house with fake evergreen and garlands ranging from the rustic, handmade variety to the tacky, sparkly, but with the crocheted trees began my holiday crafting spree. From now until December 24th I’ll be churning out ornaments, assembling gift baskets, knitting my fingers numb, and baking quick breads and candies until I am covered, head-to-toe, in a semi-permanent dusting of confectioner’s sugar. Although I will work up until Christmas, November is the best month for holiday make-ready, and I am celebrating with four weeks of Tutorial Tuesdays.
Starting next week, I’ll post a holiday DIY tutorial on the blog every Tuesday through the end of the month. This year’s theme is cheap and chic ornaments. Every project features supplies you probably already have lying around the house, or that you can buy for less than five dollars at any craft store. They may not cost much money or take much time to make, but I think the DIY project I have planned this month will add a ton of handmade cuteness to your holiday.
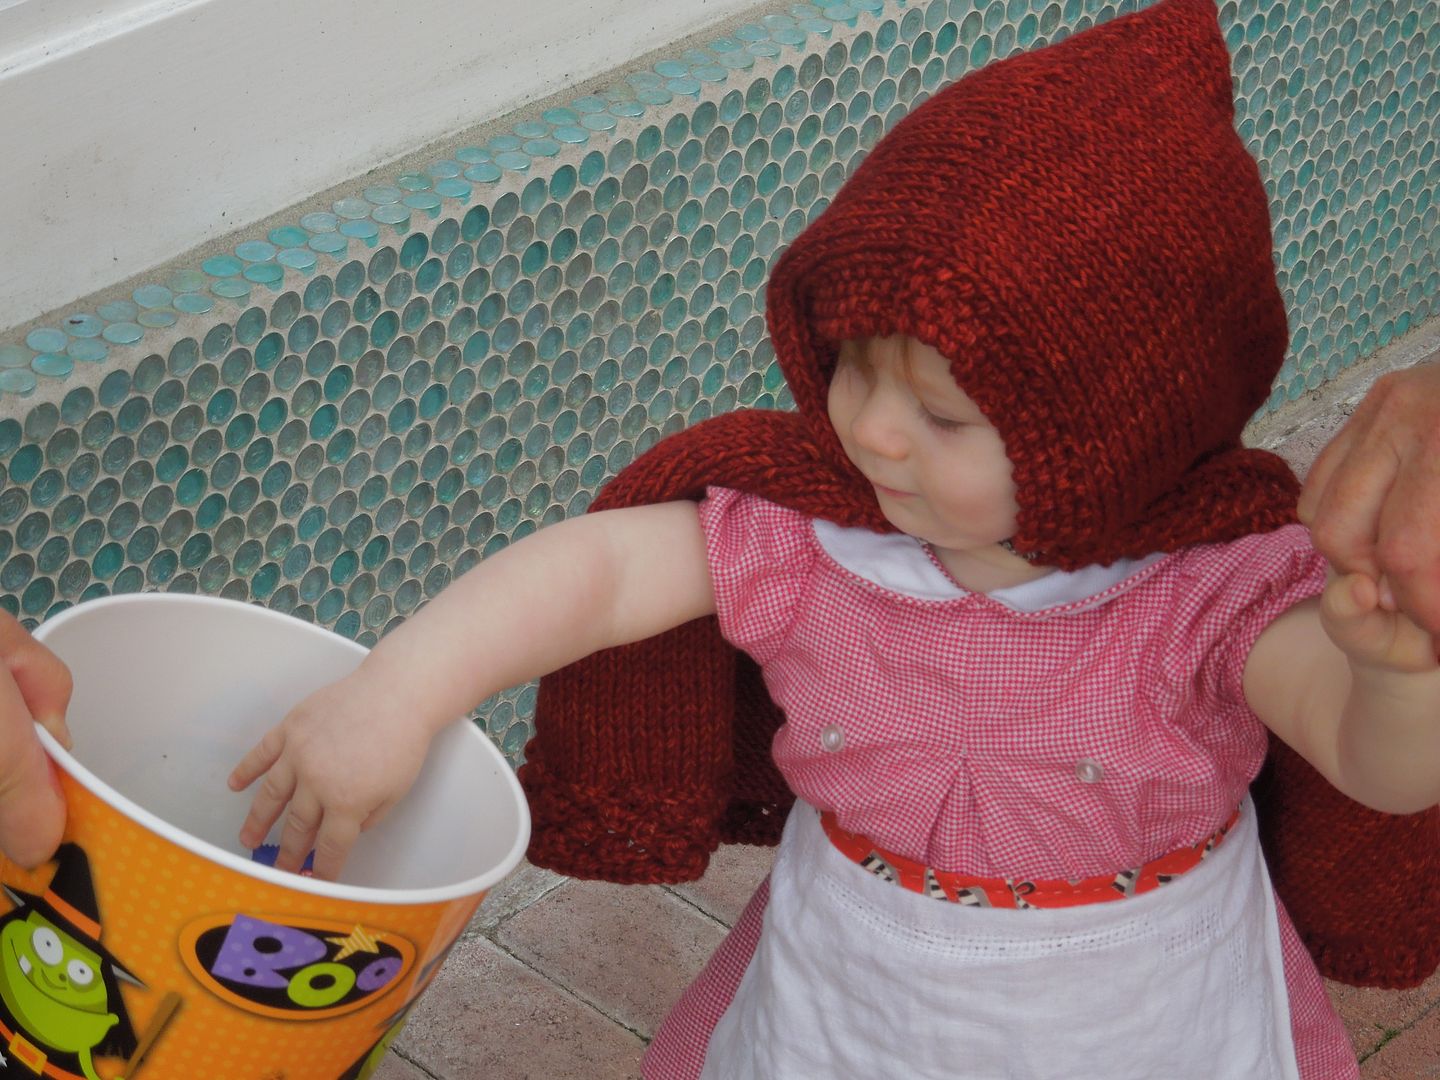
 Someone is going as red riding hood for Halloween this year, which meant, of course, that I had to make the requisite red cape. Since I had a couple hanks of Neighborhood Fiber Company's Studio Worsted in a delicious semi-solid red colorway (Old Town -- named after the home of my favorite Dublin-Style Chipper and beloved, though not oft visited these days LYS), it was only appropriate that I knit said cape.
I didn't just have the perfect yarn for the job. I also had the perfect pattern -- Capuchon, by Tagil Perlmutter. It's a wonderfully simple design with just a bit of texture around the border and at the hem, and it works up quickly with two strands of heavy worsted weight yarn.
It took me just a couple of days to churn out the one-year size, and I mostly love the finished result. The one thing that will force me to frog this sweet cape (once Halloween is over, because once I realized the error I had made, I knew frogging would put me dangerously close to not finishing on time) is my apparent inability to work a provisional cast-on. I admit, this is a technique I almost never use. I prefer the crochet method or the method that requires knitting a couple of rows of waste yarn before switching to the working yarn. My lack of experience with this cast-on, and my inability to see my mistake until I removed the waste yarn, resulted in a far from invisible seam at the nape of the neck.
Someone is going as red riding hood for Halloween this year, which meant, of course, that I had to make the requisite red cape. Since I had a couple hanks of Neighborhood Fiber Company's Studio Worsted in a delicious semi-solid red colorway (Old Town -- named after the home of my favorite Dublin-Style Chipper and beloved, though not oft visited these days LYS), it was only appropriate that I knit said cape.
I didn't just have the perfect yarn for the job. I also had the perfect pattern -- Capuchon, by Tagil Perlmutter. It's a wonderfully simple design with just a bit of texture around the border and at the hem, and it works up quickly with two strands of heavy worsted weight yarn.
It took me just a couple of days to churn out the one-year size, and I mostly love the finished result. The one thing that will force me to frog this sweet cape (once Halloween is over, because once I realized the error I had made, I knew frogging would put me dangerously close to not finishing on time) is my apparent inability to work a provisional cast-on. I admit, this is a technique I almost never use. I prefer the crochet method or the method that requires knitting a couple of rows of waste yarn before switching to the working yarn. My lack of experience with this cast-on, and my inability to see my mistake until I removed the waste yarn, resulted in a far from invisible seam at the nape of the neck.
 We ventured out for Addie's first costumed Halloween activity last weekend - a visit to a local pumpkin sale. Barring interference from Hurricane Sandy, she'll be sporting her red riding hood ensemble this weekend and on Halloween night. Then I can set to the task of correcting my mistake. In the meantime, I think she looks pretty cute, visible cape seam and all.


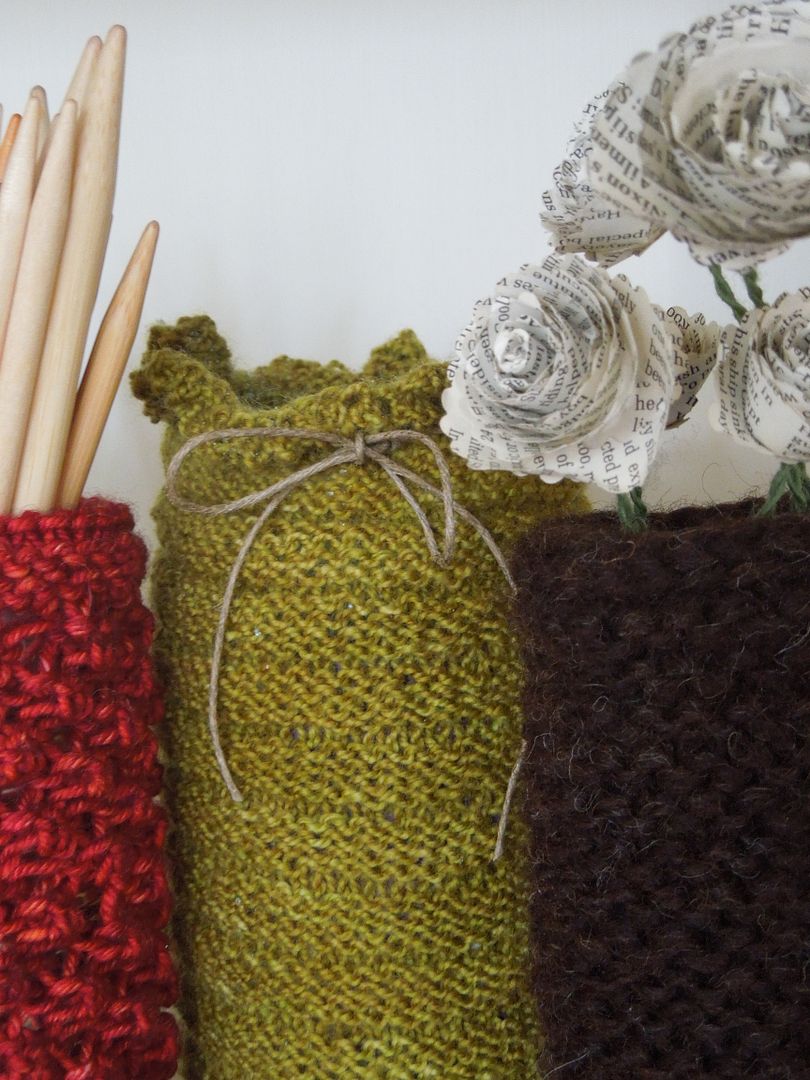
 Last weekend the first wave of deliciously chilly weather passed through DC; it actually felt like autumn and we dressed accordingly, wrapping ourselves in handknits that had not seen the outdoors since sometime last spring. The knitwear, crisp air, and crates filled with winter squash at the supermarket (and at the farmer's market) – these are all reasons why fall is my favorite season.
 Here’s to a successful first autumn DIY!