


 A pretty little sleeve that will turn jars and cans destined for the recycling bin into lovely knitted vessels. Knit one, knit a bunch, the possible variations are numerous! Since this is a pretty open-ended recipe, and the skills required include i-cord and knitting in the round, it's best suited for advanced beginners.
Materials:
Small amount of yarn in any weight
Waste yarn
One set of four double pointed knitting needles in the size recommended for your chosen yarn
One set of four double pointed needles in one size smaller (optional)
Stitch marker
An empty, clean, and lonely little jar or can in need of a yarny hug (because everyone knows that when you’re in knitwear, you are essentially wearing a hug)
Twine or ribbon, for securing the sleeve in place (optional)
Tapestry needle
Scissors
Instructions: The jar sleeve is worked from the bottom up, starting with the base. Since you will knit the base from the center out, you can check the circumference as you go, and knit a sleeve that is perfectly sized for your chosen vessel.
Setup: The setup instructions are a variation on the belly button method described here. Instead of a making waste tube, I just went ahead and knit an i-cord with the correct number of stitches.
1. Using your waste yarn, cast six stitches onto one of your double pointed needles and knit a short length of i-cord. An inch or so will do.
2. Divide the i-cord stitches evenly between two needles. Then fold the right-hand needle behind the needle in your left hand. You should now be holding both needles with your left hand
Round 1: Using your project yarn, and leaving a tail of at least six inches, knit the three stitches off the front needle. Flip your work, so the back needle is now at the front and knit three stitches. You have knit one round.
Round 2: Flip your work again and M1(make one increase), K1(knit one) into all three stitches on the front needle. Flip your work and repeat. You should now have 12 stitches. At this point, you can divide your stitches between three DPNs and begin working in the round.
Round 3: Place a marker at the beginning of the next round and knit to the marker.
Round 4: *M1, K2. Repeat from * to the end of the round. You should have made six increases and have a total of 18 stitches.
Round 5: Knit.
Round 6: *M1, K3. Repeat from * to the end of the round. You should now have a total of 24 stitches.
Round 7: Knit
At this point make sure you have on hand the jar/can/cylindrical waste receptacle because you are a knitter more ambitious than I could ever hope to become. After each increase round, lay your knitting flat and set your soon-to-be-covered object on top. I find it easiest to divide my stitches onto all four DPNs to get a better idea of whether or not you need to increase the circumference of the base so it will fit the container. Keep in mind that knitting does stretch.
Once the base almost covers the bottom of the container, you’re ready to knit the sides. If you need to make the circumference of your base bigger, continue in the pattern established above: increase one round, knit one round. On increase rounds, you will work six evenly space M1 increases.
When you’ve knit a base that will sufficiently cover the bottom of your container, purl one round.
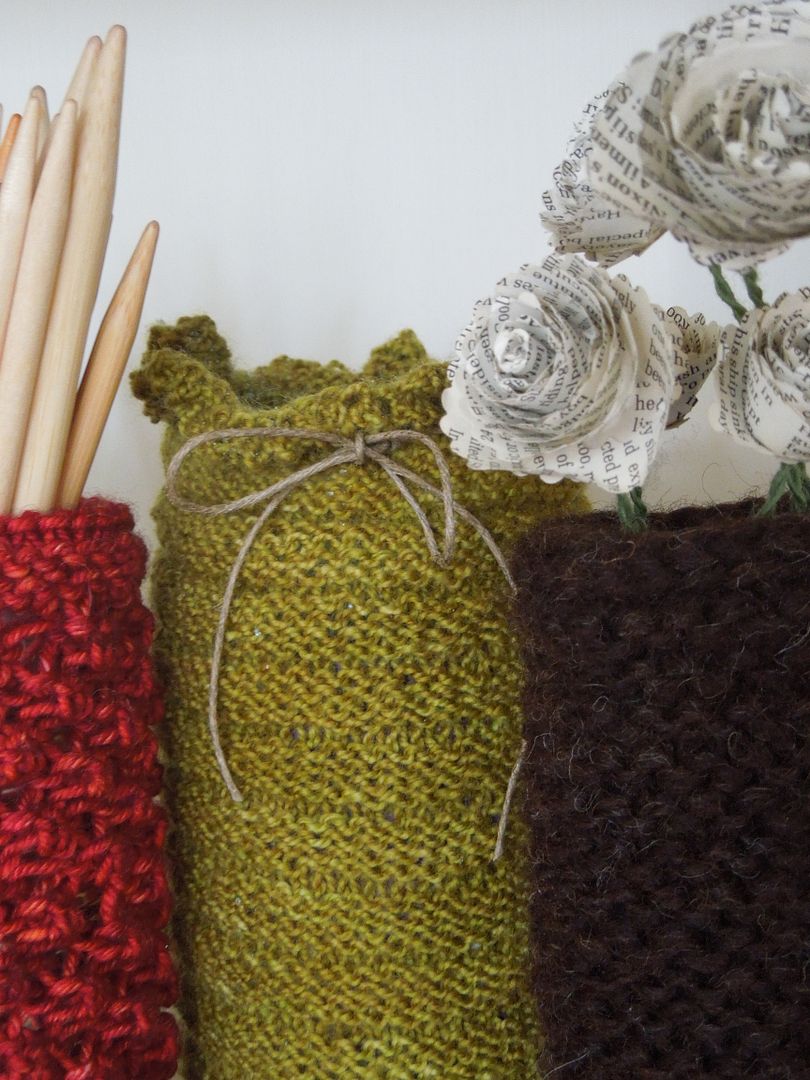
The rest of the pattern is pretty open-ended. You can simply knit every round until you’ve made a sleeve long enough to cover the sides of your container. Or you can choose a textured stitch. For my examples I used:
- Beehive (purl 4 rows, knit 2 rows and repeat) for the moss green.
- Trinity stitch for the red. You will need a multiple of four stitches for this one. For working in the round, repeat the following four rounds until the sleeve is the correct length:
Round 1: Purl
Round 2: *(P1,K1,P1) into the first stitch, K3TOG (knit three together), repeat from * to end
Round 3: Purl
Round 4: *K3TOG, (P1,K1,P1) into the next stitch, repeat from * to end
- Good old garter stitch for the brown.
The top edging is also variable. To create a neat edge that folds down into the container, like the one on the red sleeve, purl one round, then switch to DPNs one size smaller and work garter stitch for two inches. Bind off and viola!
For the green sleeve, I knit 6 rounds and worked a picot bind-off. The brown sleeve features an i-cord bind-off. You can find instructions for both bind-off methods here.
Finishing: You’ve probably noticed that the i-cord umbilical cord is still hanging out at the center of your sleeve base. I know, he’s a cute little guy, but if you don’t remove him, your gorgeous new knit-covered vessel is likely to topple over. Fortunately, removal is simple and painless.
1. Find that tail of project yarn you left when you switched from waste yarn and use it to thread you tapestry needle.
2. Begin unpicking the i-cord stitches. As you free each stitch of your first round of project yarn, draw the tapestry needle through the live stitch. You’ll do this for all six live stitches.
3. Pull the stitches closed and weave in the end.
Now all you need to do is weave in any other loose ends, slip your container into the sleeve, and fill with all manner of lovely and/or useful items.
NB: The M1 increase I prefer to use is the almost invisible method described on the techknitting blog.


No comments:
Post a Comment